Sunday, May 29, 2011

adventures in pasta

I have never made pasta before today, and I always thought it was an intensive process, with a chance of tears. And, history has shown that I have an inability to turn any type of flour into something edible.

But Geoff and I have been eating these tasty Cucina Fresca Roasted Butternut Raviolis, which, at $5 a package, are a torment. For those of you who don't know, I'm on a highly restricted food budget, and $5 for a meal is excessive. So, we decided one night that making it ourselves can't be that hard, and had to be cheaper. I was afraid of having to make the pasta myself, but I picked up some Bob's Red Mill Semolina Flour yesterday in bulk - $1.54 for 3 cups. Then the adventure began.


I got a couple packages of frozen butternut squash chunks, because fresh squash is out of season I guess. This worked out ok, because I got a couple pounds for $5, and I didn't have to cut up any squash (because that's bullshit). So I dumped it in a buttered dish with a healthy drizzle of olive oil (by healthy I mean not that healthy, probably), some salt and pepper, and a sprinkle of onion powder. (I didn't have access to a blender or food processor here, and I'm trying to replicate these CF pastas, which are very smooth. So I substituted.) I roasted this at 350F for some amount of time, I don't quite remember how long. Until it was mushy.


Meanwhile, I made one batch of pasta dough, according to the Bob's Red Mill instructions. And then I made a second batch, because one didn't seem like enough. (You may also notice that I do not have access to my fancy camera, either. Bummer.)


After an indeterminate amount of time (maybe 30 minutes or something), I mashed up the squash with some more onion powder, some garlic powder, a dash of nutmeg (for real!), half a cup or roundabouts of parmesan cheese, and some parsley flakes. And a little more salt, to taste.


So, I didn't have any fancy cutters either. I just used a wine glass. One thing I would do differently is roll the dough out super, super thin - it thickened up a lot more than I expected during the boiling.


I brushed some egg white onto this pasta round, dabbed a spoonful of squash mix onto it, and covered it up with another round. Easy!


And then I did that a bunch more times.


My mom taught me the "pressing the edges together with a fork" method.

If you note above, there are 28 (!) little raviolis in that photo. At this point, Geoff and I made a wager that the CF package has less than 28 raviolis. I won. He owes me ice cream.


The challenger!


Boiling these was like cooking some children that took me 2 hours to make.


But I have leftover squash! I would have used it, but I ran out of semolina flour.


I also have leftover raviolis!


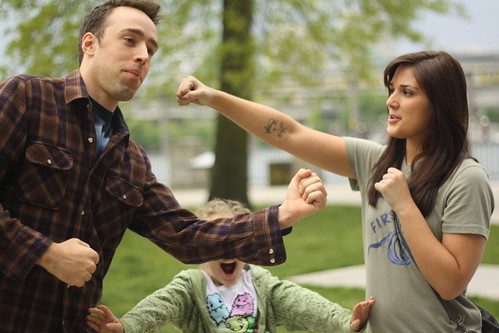
I would had more leftovers if I didn't have to feed this behemoth of a man. But he enjoyed them :)

Ultimately, I think the "recipe" turned out pretty close to the real deal. It is definitely much easier to buy the package, and it's quite delicious, so I recommend trying them. But, if you have a lot of time on your hands on a lazy Sunday, making pasta is fun! And if you can follow my instructions-that-aren't-instructions, good job! You must be a pretty awesome person.

Saturday, May 28, 2011

extracting vanillas

My best friend Chelsea of many innumerable talents shared this recipe with me recently, from Cooks Illustrated:

"To make vanilla extract, split a fresh bean lengthwise and scrape out the seeds. Place the seeds and split pod in a 1 cup sealable container. Add 3/4 cup hot vodka (we used Smirnoff--a premium brand is not necessary) and let the mixture cool to room temperature. Seal the container and store at room temperature for one week, shaking gently every day. Strain the extract, if desired, and store in a cool, dark place. The extract should keep indefinitely."

I noticed immediately that the recipe produces 3/4 cup of extract (or so it seems; I don't imagine it will evaporate or thicken very much?) This is a great deal for people like me, who are "on a budget" and don't want to spend $6 for a tiny bottle of vanilla extract. And, since I always seem to have vodka on hand, this seemed perfect!

Photobucket
Vanilla beans were on sale at Bob's Red Mill today for $2 apiece. I love bulk foods. Add to that some inexpensive local vodka, and you've got a party!

Photobucket
A split vanilla bean. Interesting. Also, now my fingers smell fantastic.

Photobucket
I scraped out the seeds using the flat edge of my knife, and threw that shit into a jar. I didn't have a 1 cup container so I improvised.

Photobucket
Since this jar of brown rice syrup has not had brown rice syrup in it for some time, I started to peel the label off but then I lost interest. This stuff looks kind of gross from the side.


Anyway! So in a week I should have vanilla extract, or perhaps I just wasted 3/4 cup of vodka. Either way, I'm excited!

Monday, May 23, 2011

i made a sweater.

I finished this last night - by which I mean, this morning at work. I'm pretty excited with the finished product, considering a few concerns I had while working on it.

1) I noticed a lot of projects on Ravelry had extra bulges in the underarm. It seemed to me that the raglan increases (you'll see those, diagonally, from shoulder to armpit - it's a pretty fantastic, seamless way to join sleeves to a sweater) perhaps continued for too long, so I left off two of those.

2) The pattern called for 8 buttons, but since I have a shorter torso and I wanted to sweater to crop a little bit, 8 seemed like an awful lot. I'm really glad I used that many because the edge of the button band (which I felt should have been straight) inevitably scallops a bit, and the spacing of the buttons helps control that. Sweet!

a sweater for a kid.

3) People kept commenting that it "looks awful small; is that for a kid?" "No," I promised, "it will stretch some." I'm really surprised! It fits like a glove. I'm sure it will stretch slightly more when I wash it, but as of right now, I don't have any intentions to block it out. It doesn't need it. That's pretty exciting.

buttons
Yeah, I used blue thread to sew the buttons on. I can't resist accent colors!

scandal!
There's no sunlight in Portland right now. You'll have to make due with a dark photo.


The pattern is Wendy Bernard's Favorite Cardigan. It took me three weeks to knit, and that is a relatively slow pace! This is probably the first sweater I've made that I actually see myself wearing, from a style, comfort and craftsmanship standpoint. Which says a lot. I've made a few sweaters.

Tuesday, May 17, 2011

the epic sister post

My sister Libby came to visit over the weekend. She had never been to Portland, so we did some fun stuff!

(I thought I had much more exciting photos before I uploaded them, but I don't. I promised a Sister Post anyway, so here it is. Sorry if it's boring.)


Look at that delicious treat. We went to Pix not once, but twice. Best place in town for delicious desserts, and the most mouth-watering macarons I've had since that one I had in Paris. They put sparklers in our desserts but I didn't get a picture fast enough.

IMG_6342
This dude at the Saturday Market had a kitten in a satchel! He told us her name is Fig, and she is a Bengal Leopardcat, and that the breeder normally chargers $700. I would love a $700 cat that chills out in a pouch all day.

IMG_6351
Libby and Geoff had a brawl. Sequoia tried to stop it. Libby, stop punching! Love is enough!

IMG_6352
"We are haters"

The coolest part of the visit, I think, was a visit to the Portland Underground, aka the Shanghai Tunnels. I read about them ages ago in Chuck Palahniuk's book about Portland (how many other cities get books by Chuck? NONE), Fugitives and Refugees. We got the Saturday the 14th "special haunted tour" which seemed a lot creepier than it turned out to be. I guess I am kind of glad I didn't see any ghosts. I don't even know if I really believe in them, but the history of the area was really fascinating, and it was cool to hear peoples' stories of things they've seen and heard while down there. I highly recommend it, but the paranormal tour only happens on Friday the 13th/Saturday the 14th, or by special request.

IMG_6362
This is just an exit sign. No ghosts.

IMG_6368
THIS IS A GHOST or our tour guide.

IMG_6369
We had to go through this super creepy tiny door.

IMG_6372
Libby, in the second camera, in infrared. OH MY GOD SHE'S A GHOST.

IMG_6371
Opium den. Did you know the shanghai tunnels (which are not really tunnels) are pitch black except for a couple dim lights? It is hard to see, much less focus a camera.

IMG_6376
When dudes were shanghai'd in Victorian times, they threw them down in some cells and took their shoes. The ground was lined with glass and other sharp objects so that in the event that a prisoner did escape, they could find him by the trail of blood he left. These are shoes. Super creepy.

IMG_6385
These rocks sometimes reveal a ghostly apparition of a sailor boy when photographed. It didn't happen for me. :(

IMG_6387
A deadfall, placed at a bar, and used to whisk drunken young men away sight unseen and sell them into slavery.

IMG_6392
A creepy bricked-up window with no ghosts!


We went to Ikea where Libby got a little overwhelmed.


And then our uncle made us ham! Crazy delicious.


End of boring post.

Monday, May 16, 2011

the plant post

When I was like 9 or 10, I wanted to grow a garden. I was thinking big, like watermelons and other large, time- and space-consuming plants. My dad compromised by getting me a window box and packets of herb seeds. I forget what I had specifically, but I like to think it was parsley, sage, rosemary and thyme (ha). Anyway, they grew like crazy! I decided I had a green thumb. But the herbs never got eaten, and the next plant I tried to grow, my sister stepped on, so I gave up the dream for a while. Then, Rachel, Brandi and Lisa, who had formed the Portland Ladies' Garden Club, invited me to come plant seeds with them. I thought, "I am the best seed-grower I know," which should go to show that I must not know a lot of people. I picked out some cherry tomato and basil seeds, and immediately began craving pasta sauce. And I planted them in the meantime.

IMG_6066
We planted them in empty egg cartons, and after about 10 days, started to get sprouts. I was pretty amazed at the power of a tiny little seed. The tomatoes shot up really big and really fast. (And, I know, maybe someday I will get the focus right.)

IMG_6069
Here are some basils.

IMG_6404
A few weeks later, they were tall enough to divide into their own pots. Here are my tomatoes and a couple basils, just before repotting a second time. They are so big!

IMG_6405

IMG_6406
After being repotted: I read somewhere that when your tomato sprouts start growing their third set of leaves, you cut off the bottom two and replant the entire stem so that it can grow a stronger root base. I only cut off the bottom set of leaves, because I was afraid they were going to look naked. And, if the plant on the right doesn't make it, that's because I accidentally snapped the stem. I'm horrible.

IMG_6407
So ideally in about 100 years I will get some tomatoes. I'm pretty impressed with these little guys, considering how they appear to be doing with such little sunlight and also indoors. But maybe plants at 5 weeks should look a little bigger? Until someone proves me otherwise, I'm still the best seed-grower I know. So there.


Soon: the epic Sister Visit post.

Saturday, May 14, 2011

Soon I will have a sweater


It isn't done quite yet, so it doesn't close in front, but I knit most of this in less than a week. It is Wendy Bernard's "Favorite Cardigan," which I would link to here except it's in a book called Custom Knits. It's a pretty solid pattern and a quick knit in worsted weight yarn, although the yarn I used seems to be classified as "chunky." I got gauge on size 7 needles with it so who cares?


Here I am in the bathroom at work. I'm impressing coworkers left and right!


My favorite technique for small-diameter circular knitting. Double-pointed needles are the most clumsy thing I've ever done; I will probably revisit this at some point.

Thursday, May 12, 2011

Droid test!

I can blog from my droid? The future is here.

Wednesday, May 11, 2011

my knitspiration

I've blogged before (that whiny teenage LiveJournal garbage), but the person who really inspired me to start an adult-ish blog about my knitting, interests and pursuits was Ann Weaver. (Okay, okay, credit where credit is due: Rachel Red Lips had a big hand in this too.)

I think I've read almost every blog entry of Ann's, which goes to show I am either 1) really bored or b) super interested. I think it's b. Ann shares most of her patterns for free on ravelry.com, and she just published a book. A book! She is a normal person with an everyday life who knits like a champ (I don't know where she finds the time to crank out all her projects), designs amazing, easy-to-follow patterns, and has a book. And she is crazy cute. When I am having "knitter's block" (not a real thing), I can look at her Flickr and cure it.

Ann Weaver, thanks for being my knitting hero.

Here are some pictures that make me happy. All credit for everything goes to Ann Weaver, whose blog and Flickr you should be checking out anyway.

Everybody Knows:  Side view
I love her androgynous style. I find too many knitting patterns are too lacy, frilly and feminine, or too shapeless and boxy. Ann strikes a nice balance with good shape, yet flattering fit on slender ladies.

Grellow 2-ply Corriedale
Hand-spun yarn! So beautiful.

Oranje with Providence in the background
My next project, as soon as I can acquire this fantastic wool/cashmere yarn in awesome bright-ass orange. An Ann Weaver design!

Giles Deacon inspiration + 1.5 pounds of roving + 1 broomstick sawed in half  = successful SCARF experience
Sweet.

Monday, May 9, 2011

this cannot be a how-to...

...unless you really want to know how to make lots of mistakes.

Case in point: the sweatervest from hell. It took months to knit up, and when I was done, I had to cut holes for the neck and arms. And only after that did I think it might be a good idea to measure the thing.

first attempt

The orange lines are where I made the cuts! Except, the overall length was supposed to be 22", and mine was 29". Like me, you might think, "Jenna, clearly you did not follow the instructions." But I did, except for this one part where the pattern said "check your gauge."

Did you know that not all people knit alike? I didn't. I thought if I used the right weight of yarn, and the right needle size, and followed all the directions, that I would end up with a carbon-copy of everyone else's vest.


The outline of this chart is the original pattern. The orange highlighter is the drastic alterations I had to make.

steeking second attempt
And here are the cuts.


And, the final result, on my best friend, looking awesome.


I make mistakes DAILY. But most of them can be fixed. I learned some lesson from this sweatervest about gauge, but I still don't check it all the time. And I use the wrong weight of yarn, if I want. And, I leave out the celery in my soups if I want. And, sometimes I don't wear a seat belt. I never said I was a role model.